Fleet and machinery
Register farm machinery and equipment to track their use, maintenance, and repairs.
Use with AI
External services may not be able to read this preview. Use Copy for AI instead.
Availability: In the standard configuration, these features are included starting with the Harvest plan. Access also depends on the features enabled in your account and on your role’s permissions. Compare plans.
Machinery
Section titled “Machinery”In Aragro, you can register the machinery, vehicles, and equipment you use on your farm to track the maintenance and repairs each one needs.
Registering your fleet and machinery also lets you use them in work orders and view reports of machine hours used and each machine’s efficiency.
- Open Fleet and machinery in the Fleet and Machinery module from the main menu.
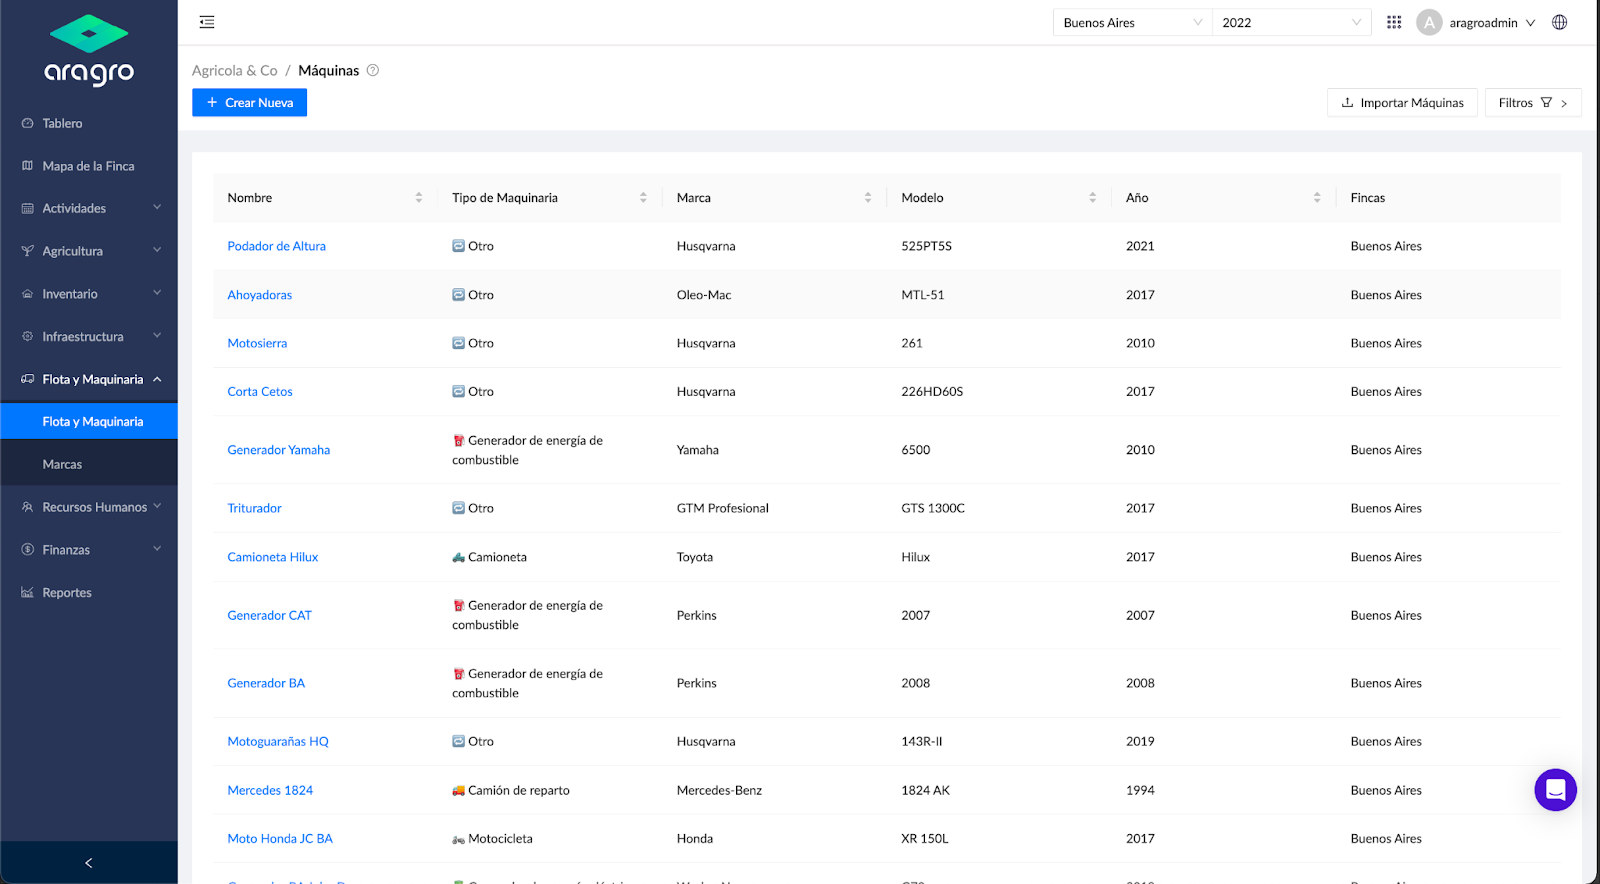
- If you have previously registered a machine, a list appears. Select a machine to view basic information such as type, brand, model, year, the farms where it is used, its odometer and hour meter, and its usage history. You can also go directly to https://app.aragro.com/machines.
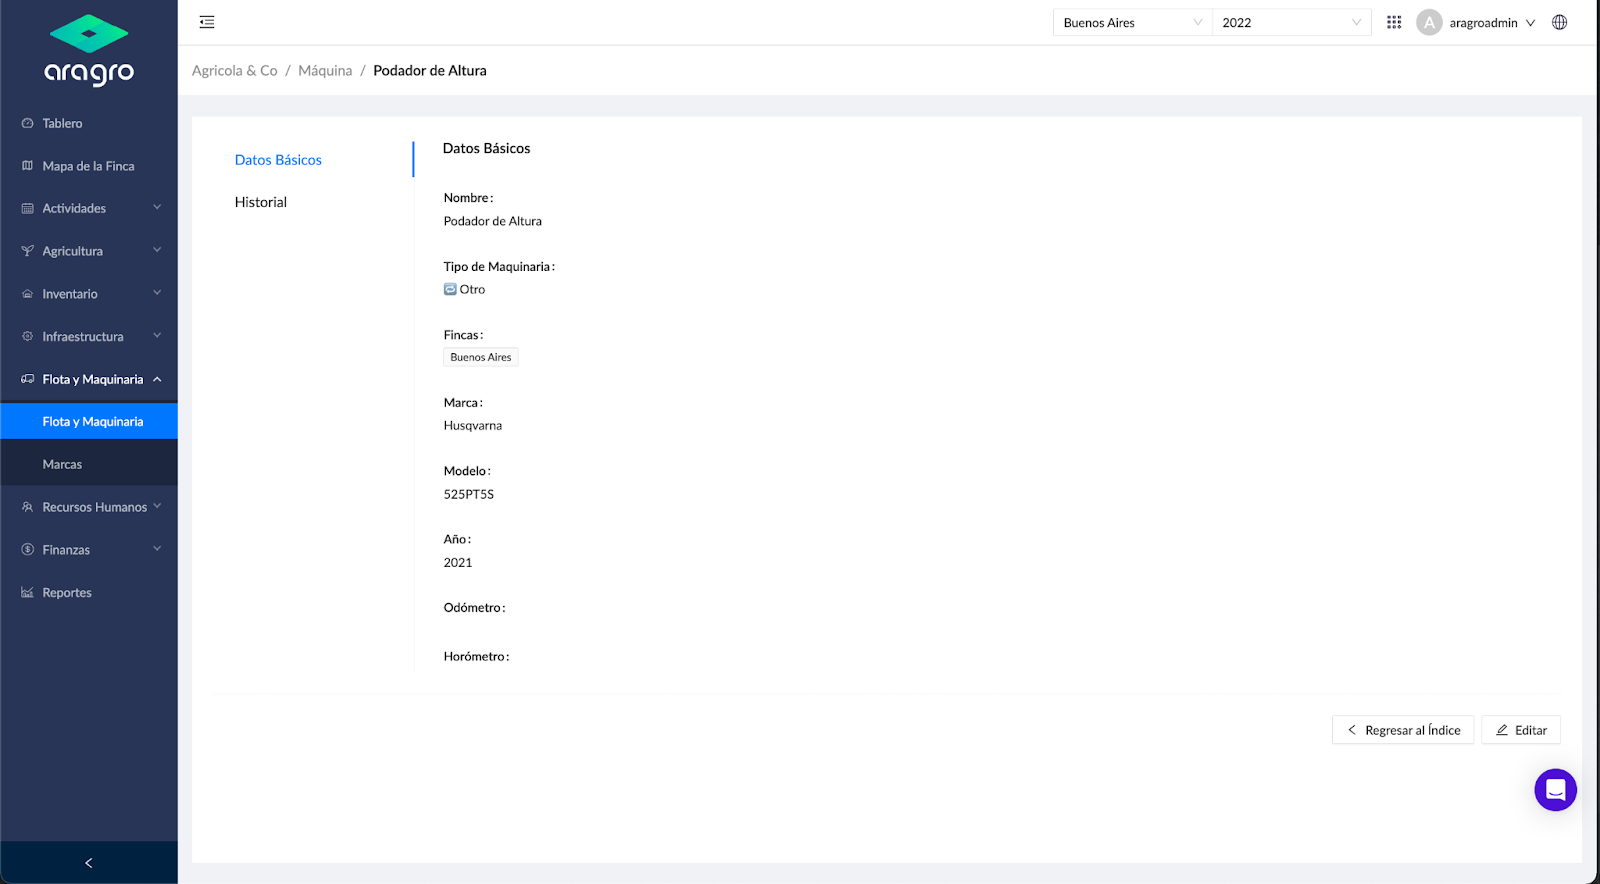
- In the module, you can register a machine by creating a new record or importing a file. You can also edit an existing record.
a) Create new
Section titled “a) Create new”To register a machine, click the blue “+ Create new” button. Complete the basic information form, then click Save.
The form includes these fields:
- Machine type: Select from another list at https://app.aragro.com/machine-types. If the type is not registered and you do not have access to create it, contact your administrator or support team for help.
- Farm: Select from the farms already registered in your account.
- Brands: The system has a catalog at https://app.aragro.com/brands, where you can add or delete brands. If a brand is not registered and you do not have access to create it, contact your administrator or support team for help.
- Cost center: Assigned automatically, but you can change it manually.
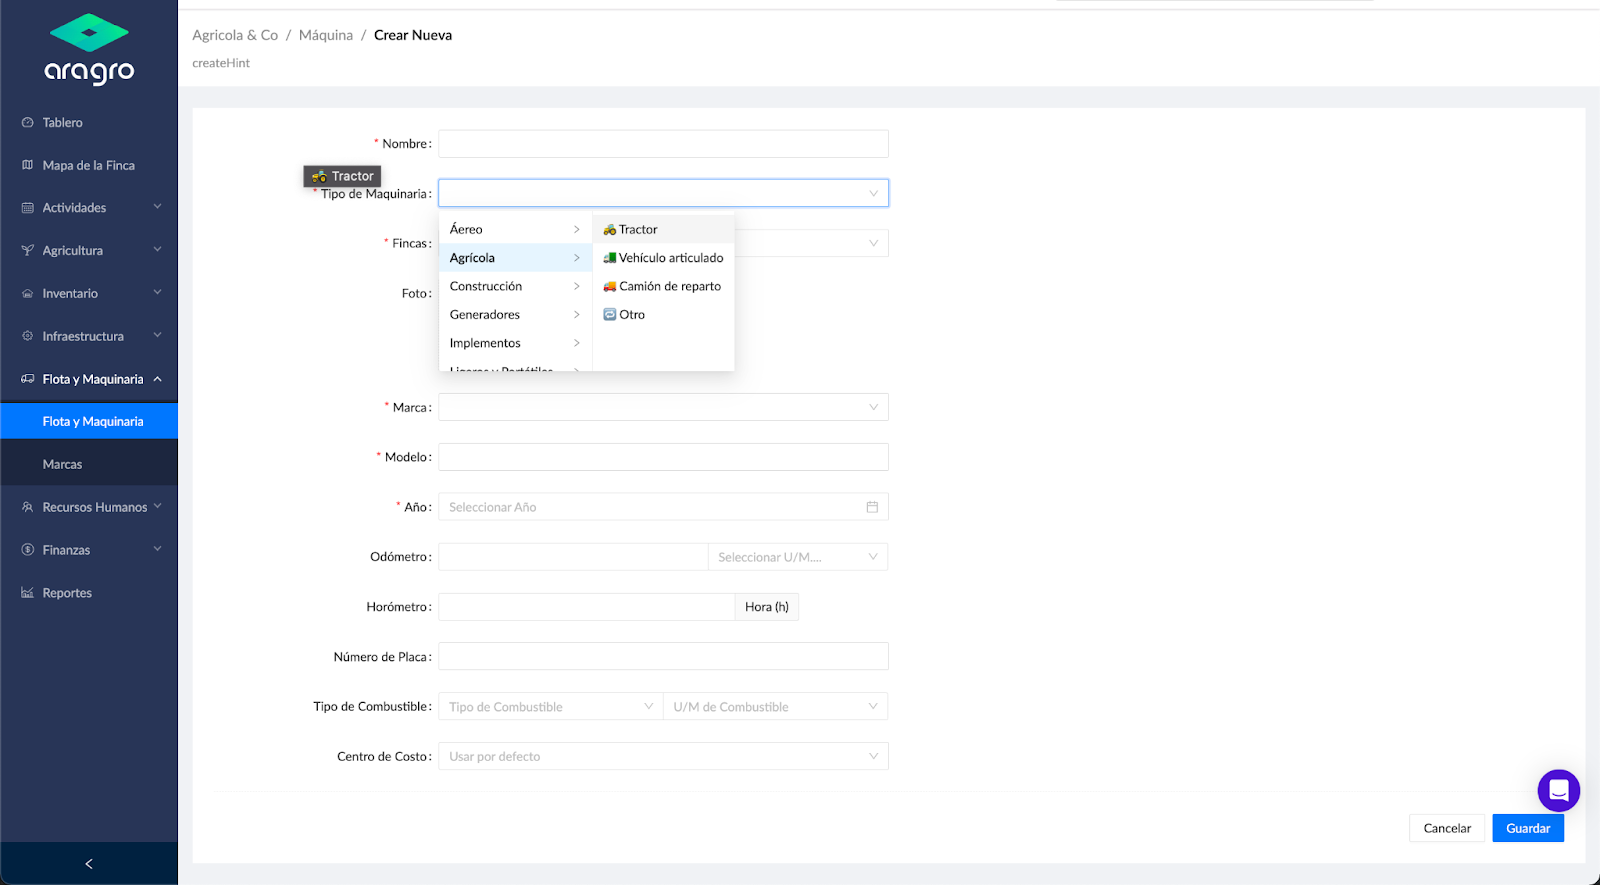
Note: Fields marked with an asterisk (*) are required to continue to the next step.
b) Import
Section titled “b) Import”Importing speeds up creating multiple records. Download a template, fill it in manually with the required information, and upload it. The system then creates or updates the records automatically.
To create an import:
- Click Import.
- Select the language and import type.
- Click Save.
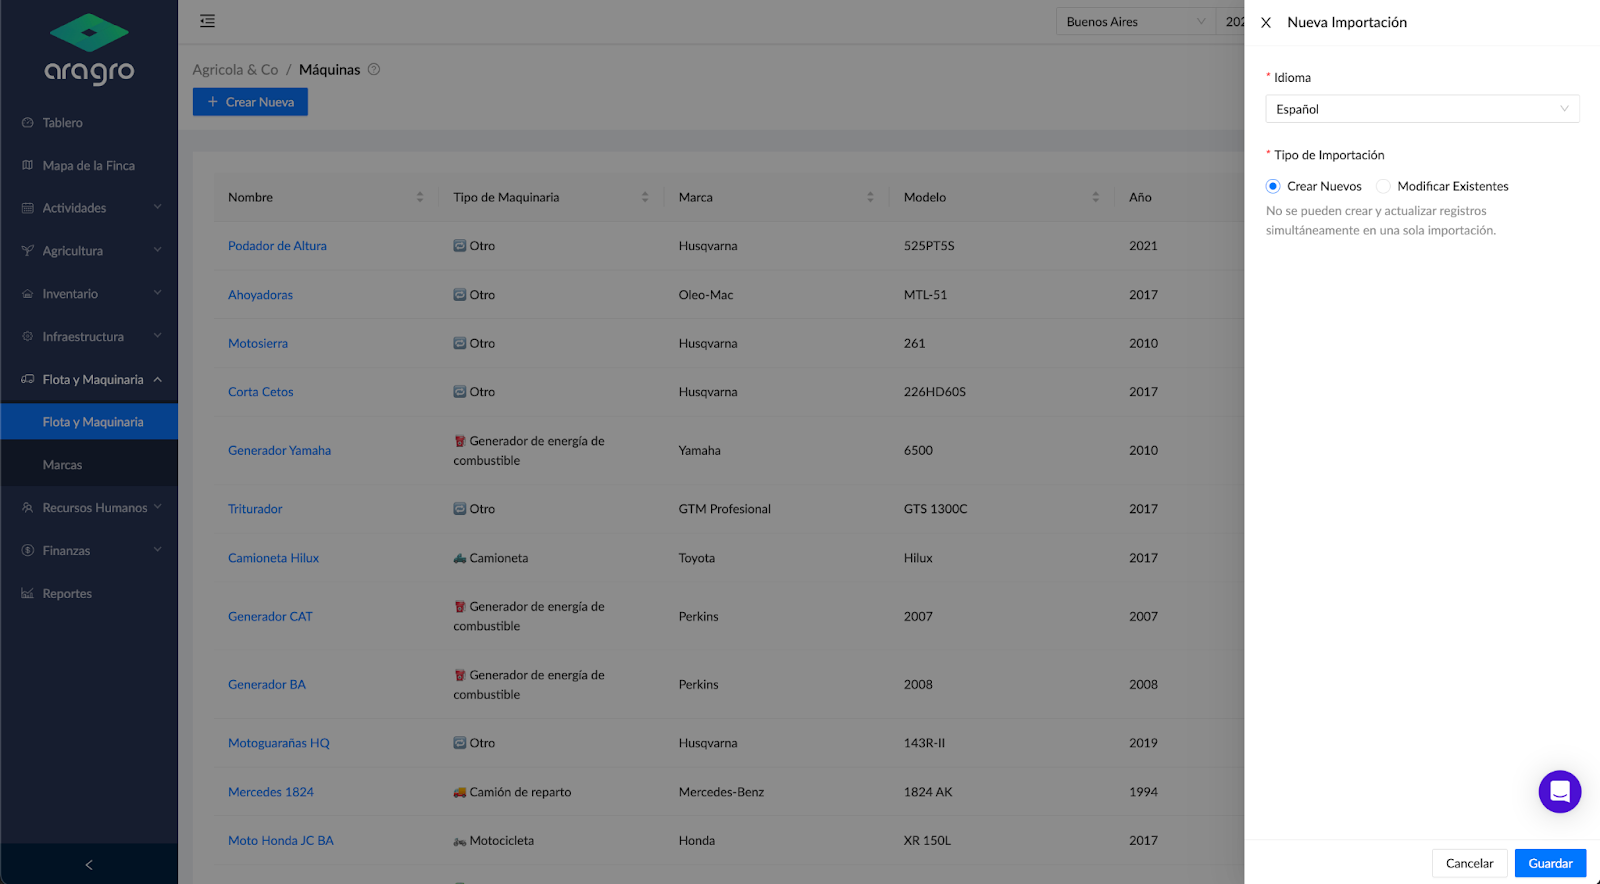
- First, download the template.
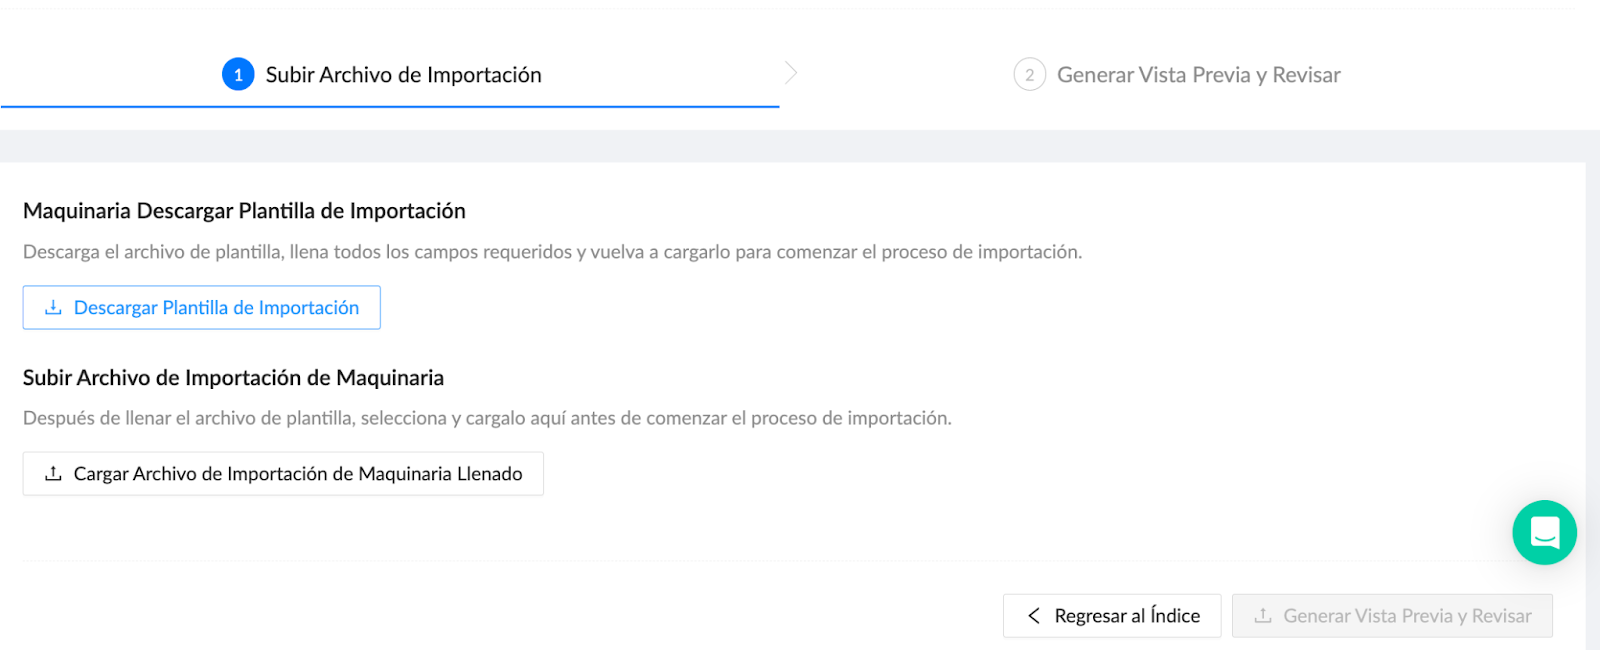
- The template is preloaded with information such as machine type to speed up data entry and avoid duplicate or misspelled entries.
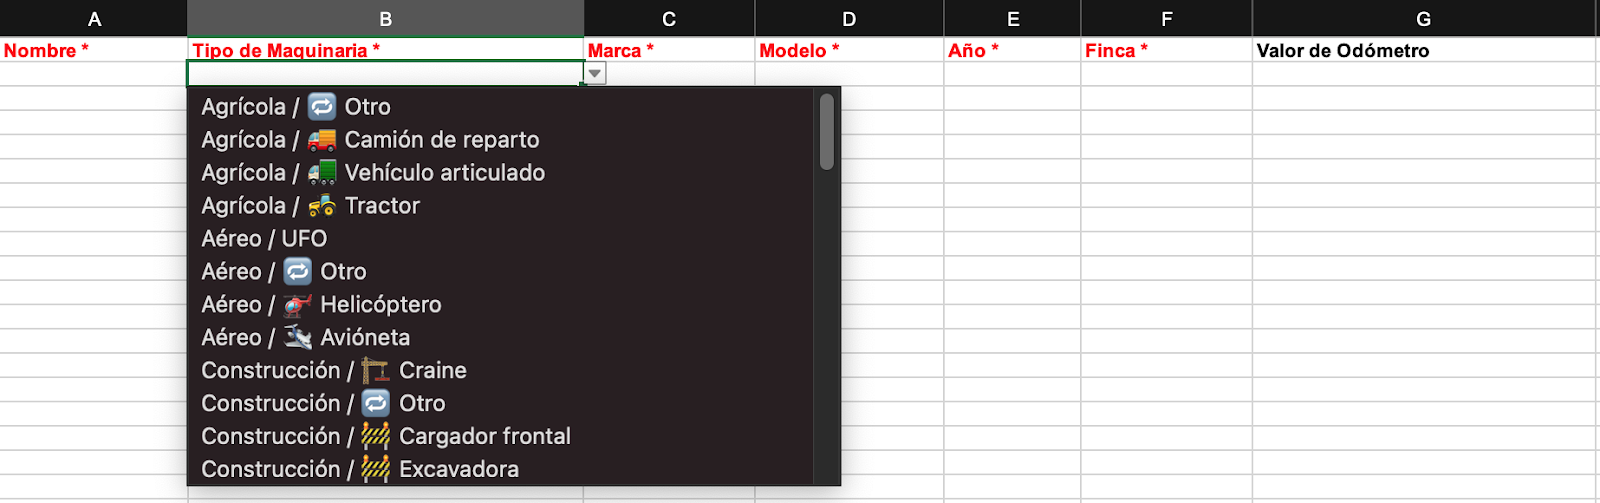
Note: Red columns contain information required to continue to the next step.
- After filling in and saving the template, upload the file.
- Click Load import file. A window opens where you can locate the file you created.
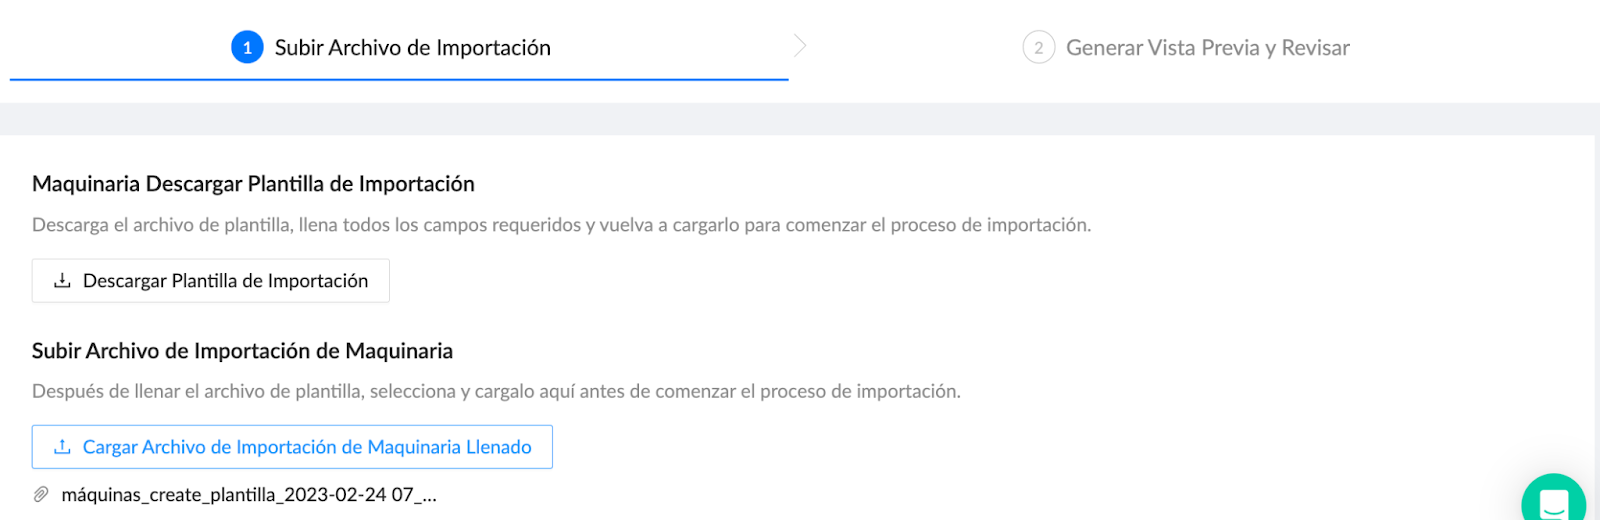
- Click Generate preview and review. The system validates the records and shows the total number of correct and incorrect rows (row and column). If the number of records is correct, you can complete the import.
- Check the list to confirm that the records were created correctly.
c) Edit a record
Section titled “c) Edit a record”To edit a record, select the machine in the list. A side menu appears on the right, with a pencil icon at the upper right  .
Editing activates all available fields for changes, such as Farm, Type, and Brand.
See also: Machinery and equipment · FAQ.